The Ring Doorbell has become one of the most popular smart home devices, offering security, convenience, and peace of mind. With features like motion detection, real-time alerts, and HD video streaming, it’s no surprise that many homeowners are making the switch. The good news? You don’t need to hire a professional to install it.
This guide will walk you through the step-by-step process of installing a Ring Doorbell on your own, whether you have existing wiring or prefer to use the wireless (battery-powered) option.
What You’ll Need Before You Start
Gather these essentials before installation:
- Your Ring Doorbell device
- A charged Ring battery pack (if using the battery model)
- A drill (optional, for mounting on brick or concrete)
- Screwdriver (usually provided in the Ring kit)
- Mounting screws and anchors (included in the box)
- A smartphone with the Ring app installed
Step 1: Download the Ring App & Set Up Your Account
Before mounting, download the Ring app (available for iOS and Android).
- Open the app and create a Ring account (or log in if you already have one).
- Tap “Set up a device” and select Video Doorbell.
- Follow the prompts to connect your Ring device to Wi-Fi.
💡 Tip: Make sure your Wi-Fi signal is strong near the door where you’ll install the device.
Step 2: Charge the Battery (If Applicable)
If you’re using a battery-powered Ring Doorbell, fully charge the battery pack before installation.
- Plug the battery into a USB cable until the LED indicator shows green.
- Insert the charged battery into the doorbell.
If you’re installing a hardwired Ring Doorbell, skip this step.
Step 3: Remove Your Old Doorbell (For Wired Setup)
If you have an existing wired doorbell:
- Turn off the power at your breaker panel.
- Unscrew and remove the old doorbell button.
- Pull out the wires and make sure they are still intact.
💡 Important: Always double-check that the power is off before touching wires.
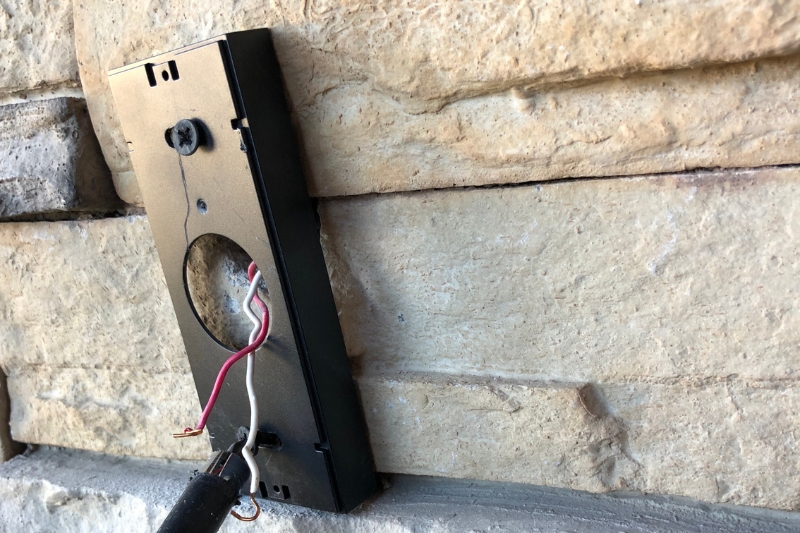
Step 4: Mount the Ring Doorbell
- Hold the Ring Doorbell against the wall where you plan to install it.
- Use the included level tool to ensure it’s straight.
- Mark the screw holes with a pencil.
- Drill pilot holes if you’re mounting on brick, concrete, or stucco.
- Secure the doorbell with the provided screws.
For battery models, mount directly to the wall or doorframe.
For wired models, connect the wires to the terminal screws on the back of the Ring before mounting.
Step 5: Connect to Wi-Fi & Test
Once mounted, go back to the Ring app:
- Confirm your device is powered on.
- Connect it to your home Wi-Fi network.
- Test the video feed, audio, and motion alerts.
💡 Pro Tip: If the video lags, consider using a Wi-Fi extender near your front door.
Step 6: Secure the Device
After confirming everything works:
- Attach the security screw at the bottom of the doorbell to prevent theft.
- Adjust settings in the Ring app (motion sensitivity, notifications, chime tones).
Troubleshooting Tips
- No Power (Wired): Check that the breaker is on and wires are properly connected.
- Battery Model Won’t Power On: Ensure the battery is fully charged and clicked into place.
- Poor Wi-Fi Signal: Move your router closer or use a Wi-Fi extender.
Conclusion
Installing a Ring Doorbell without professional help is straightforward, whether you choose the wired or wireless model. With just a screwdriver, a smartphone, and a little patience, you’ll have your smart doorbell up and running in under an hour.
Once installed, enjoy the benefits of real-time video monitoring, motion alerts, and seamless integration with your smart home system—all while saving money on installation costs.